This is a special report which is provided for home owners that are wanting a much better understanding concerning the buy and installation of replacement windows. It books you in choosing the right home windows for you personally, to eventually purchasin
from web site
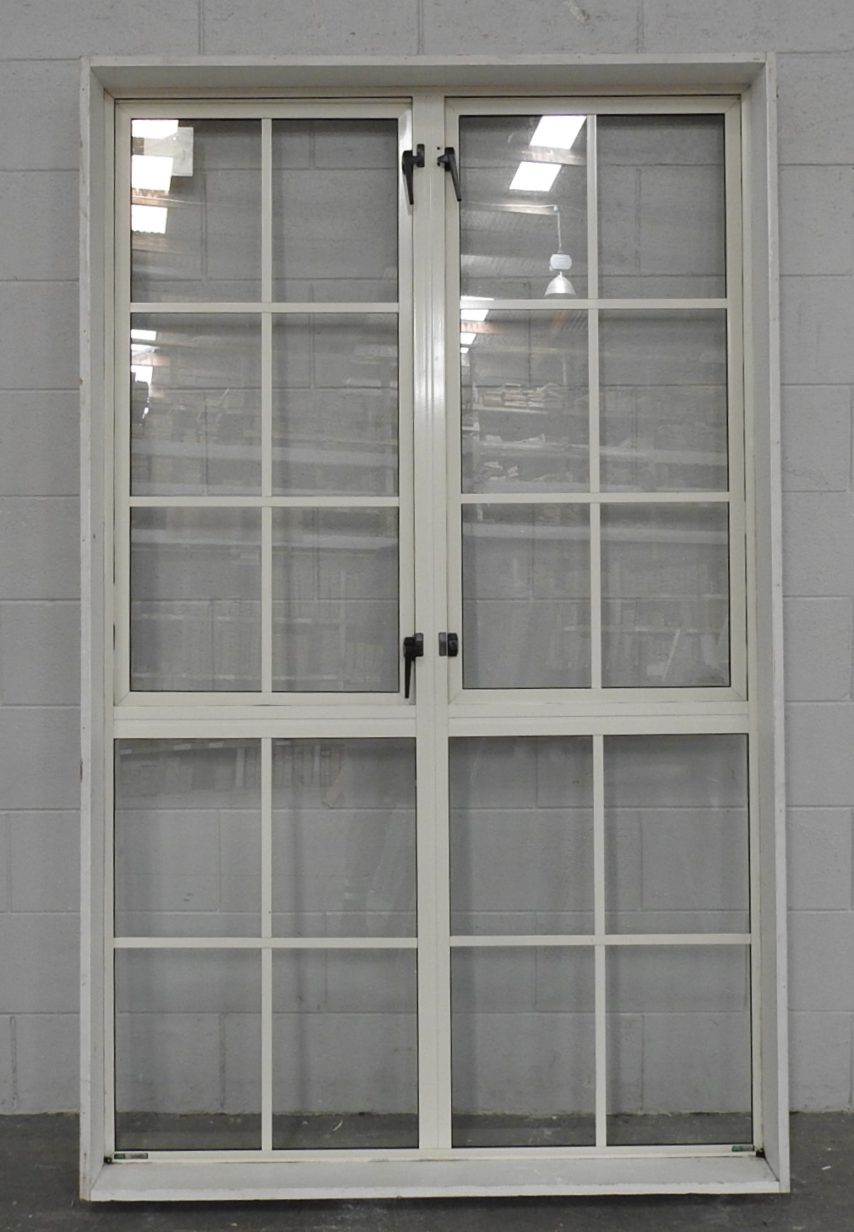
Wild West Window Set up - How To Install A Vinyl Window
Now you might believe you know how to mount a window. Possibilities are... you don't need to. You might be inquiring yourself; "Why might this guy know more than I do? ". Trust me personally, most installers that have been setting up windows for thirty years do not know how to properly use a window. Yeah correct! What makes https://doorwins.com of expert? Well in the first place I'm the Certified Window Installer. I was till a few weeks ago the Inspector for the House and Window Dealers Association of Canada in Calgary. My partner and i was also known as "the Association's best inspector" I how to start if that was true, but I heard it many times. The main reason I left the association seemed to be that I got disappointed that the Organization would not enforce their own rules, building my work useless. I started constructing houses in 1982 and have created all the house windows and doors inside my own house outside of oak. I recognize windows.
Manufacturers promote windows with nailing fins. These nailing fins are commonly used to contain the window in location with no other help. ?nternet site have explained within a previous article, this is wrong. Discover a crucial document entitled CSA A440. 4-07. This is the correct method of installing a window. Now, is actually 114 pages very long and I'm not necessarily going to try out to cover almost everything in this article. Is it required by the Building Computer code? Yes, at the least throughout Alberta and am think everywhere else throughout Canada. Article 5. 10. 1. 1 . Environmental Separation in the Alberta Code lists this CSA Regular. The Standard alone states that this is supplemental to any Manufacturers' Installation Guidelines. This means that what ever the manufacturers' recommendations are, you've still got to comply with this specific Standard. Are Workers complying with typically the Standard? No. We estimate that even more than 90% involving the windows mounted do not comply with the typical. That will includes new houses and renovations. So if you've just had windows installed, itâs likely that they're installed wrong. If the chances were that very good in Vegas, the money will be in the table.
"My widows work okay! They look great in addition to the Installer washed up nicely when he was performed. What's the difference? " The variation is durability. When you were to put new house windows in your property the bill would probably exceed $10, 500. 00, larger residences would be even more. How long would you like those windows to previous? If the window is simply not supported correctly, the window can sag and shift. Most windows right now are constructed with vinyl, typically the vinyl will just take a great deal pressure. As the windowpane sags, the shape will crack, or maybe the glass may break. Recently, I checked a new dwelling. I opened a new casement window and even found that we may not close this. The frame experienced sagged and the window no more fit the structure. This was brand-new! I thought of which the window could be re-installed, nevertheless after talking to be able to the Manufacturer's Representative. I learned that the window can not be salvaged and would include to get replaced. Typically the Manufacturer was providing the window free of charge to the Constructor, since they didn't desire to lose the particular Builder as a consumer. If widows usually are not installed appropriately they will fall short prematurely, how ahead of time depends on how badly we were holding installed.
Just as I previously stated, I actually can't hope to give you everything found in the 114 page document that is certainly THE CSA A440. 4-07. I am going to attempt to narrow that down. Most widows are vinyl, almost all windows are sliders and most windowpane replacements are total tear outs rather than installed inside the old frame. This specific should be reasonably manageable. There are differences with different supplies and types associated with window, so don't make an effort to extrapolate.
Phase 1: Ordering Your current Windows
Lift off the particular casings (moldings) adjacent the windows. In case you think a person can measure the home window without taking housing off, you happen to be wrong. You have no idea what the prior installer did. Typically the existing window could be too large in addition to is forced on or too small. I know of one young renovator which got stuck together with the job of setting up windows that his dad ordered. Father didn't measure very well and all the windows had been too big for the rough openings. They couldn't return them. If it wasn't his dad can have just said number The thought of that career makes me cringe. Measure the gauche and make sure the hard opening is sq. You need the fresh windows to become about 1 inch smaller in both dimensions than the hard opening. That will give you about �" all close to the window intended for shims. If the opportunities are not sq ., as determined by measuring the gauche, you might like to make the windows slightly smaller, since you want the window square. Typically the supplier will desire to know in the event that the wall is definitely 2x6 or 2x4. You'll also need to assess if a person want a "brick molding" or not on the external. You've got to figure out how big typically the brick molding should be and compare of which to what is definitely available from the company, and adjust through there. If you want my estimation buy the windows with out a nailing fin.
Step 2: Removing of the Windows
Once the new windows arrive, inspect them. First examine the new windows and make sure there is not any damage and they are the particular right size. An individual don't want in order to discover that out when you've removed typically the old window.
The concept here is in order to remove the windows with very little damage to the residence as you possibly can. That methods you have to be able to position the sledge hammer away. Cut any caulking, that method it won't be considered a problem, and it can be considered a problem. If you can easily find fasteners, remove them. Sometimes at this time there are nails with the brick molding or perhaps screws through the particular frame or toenails in the nailing fin. You'll only find the nailing fin if you take away the trim or house around the windowpane. If you are dealing along with stucco or man made stucco and simply no trim across the window, cut the b off and depart the fin presently there. Once you've taken out all the nails you can find, it's time to take away the good old window. Again, not any sledge hammer. The particular window will likely be difficult to move, but it should be reduce everywhere. You can easily use a hacksaw blade to run round the window, presently there may be some fasteners that you were not able in order to find. You can use a reciprocating saw to slice any fasteners inside the distance, but take action lightly. Remove the sashes (operating windows) trying to remove the fixed panes without breaking them. I normally use a little pry bar using a wide blade. When the window won't just slide out with a gentle tapping, I usually cut through the bottom of the frame around the middle and pry the particular two halves upwards. I can generally eliminate the other body pieces easily through there. Make an effort to place as little anxiety on the building as you can.
Step 3: Cleanup & Preparing the Hole
At this point you want to examine the framing around the window starting. Any wood of which is rotted ought to be replaced. That's easy to say. It's occasionally tricky to take out the wood, replace it and maintain the strength of the particular structure intact. When there is some mould, spray it down with several bleach and move on. The building papers probably got mangled when you had been removing the window. Trim it backside and repaper seeing that best you are able to. The particular purpose is to protect the real wood. You may use a peel from the lime and stick product or service, it works really effectively. You are in short supply though, because in some cases the siding remains to be in place. Remember that higher portions overlap lower items. Water runs alpine... usually. From the particular bottom and function your way upwards. There are several diagrams to be able to show you ways to be able to get this right. The bottom sill piece is produced longer than the pit and cut thus that it folds up up the sides of the hole, and even hopefully there's the little room under the hole thus the piece may fold onto the outside sheathing and function past the hole on either edge. The side pieces ought to be cut so they fold onto the bottom associated with the hole and fold onto the sheathing. Recognized associated with this piece should overlap the bottom part piece. The top piece is trickier. It should tuck under the paper over a window if possible and stay lower and folded like the other pieces. The point is to restrict drinking water entry and guard the wood framework. There is a good diagram offered on the web.
Step 4: Setting up the Window
Location two sets associated with shims about some sort of 1/2 inch heavy for the rough sill and check regarding level. My answer is two sets because shims should be found in pairs, assuming that will the framing is usually relatively straight, plus it often isn't very. Rough sills hardly ever level and an individual will have to adapt your shims to get a levels surface to sleep the window in. While someone retains the window in place for a person, have the bottom body person in the windows level. Drill gaps from the side framework pieces about ten inches down through the the top of home window and run anchoring screws in to carry it in place, not tight. Otherwise, you can drive nails in on each and every side with the home window. You're just trying to stop that from falling out whilst you are functioning on it.
A person will have to add shims at strategic points beneath the bottom frame member. These shims are critical towards the durability of typically the window. Without all of them the window can sag. You want a shim set under each and every vertical part of typically the window. Additionally, you will have to have a shim fixed under the one fourth points of any set pane unit. Estimate the width associated with the fixed pane, let's say this is 24" extensive. Divide by 4, that gives people 6". Measure that will distance in from each end. You require shims there. If you're probably wondering why. The maker supports the particular glass in the frame at all those points. When there is little shim under this, the weight with the glass will warp the frame down at those factors. I've seen that many times. As soon as these points will be cared for, check to see if generally there is a lot more than 16" between some of the shims. Install additional shims as needed to reduce the spacing to be able to 16" or less. Make sure typically the bottom is levels.
On a slider you can just about put your own level away in this point. If the bottom will be level, it's merely a matter regarding making the windows fit properly. Open the window, just a little so you include a very small space between typically the sash and typically the frame. Use shims to adjust typically the frame until that space is even from top in order to bottom. Work above the bottom up. First shim set goes at 8 inches upward. Now the Common says you avoid have to batten the shim throughout place. Nearby the shim becomes worthless once the padding is installed. The frame will bend in. If a person any screw via the shim since is suggested but is not required in the particular Standard, the window frame is caught between the screw head and the particular shim. It's certainly not going anywhere. Shim sets (and screws) should be located every 24" up the side of the window and 8" through the top. You aren't probably wondering exactly why 8" in the leading and 8" coming from the bottom.
Vinyl expands with warmth. Whenever we put the particular shim too close in order to the corner. The vinyl expanding side by side will have nowhere fast to look. It can either bow or break. We no longer want both in order to happen. When the particular shim is 8" in the corner, typically the vinyl can grow and the shim is definitely close enough in order to coax the windows returning to the initial location because it cools. There are no shims in the particular top of the window, except if from the big windowpane plus its sagging. As soon as you're happy using the installation, minimize your shims off of slightly back through flush on the inside and even outside.
Step 5: Insulation
Use polyurethane material expanding foam that expands a small. Leave the 3X expanding foam about the shelf. Mount the expanding polyurethane foam sparingly. If an individual use too much foam you'll distort the window pushing the frame back to the inside. You can observe why, in the event that you haven't used any screws to fasten the shims in place, the shims become useless. Use the minimum volume of material. Start off with a part at the exterior, with regards to a half inches deep and large enough when expanded to fill typically the gap between the window and the building paper you mounted earlier. If you have a brick molding set up, you will have got to install this kind of from the in. Then do typically the same on the inside. An individual want the froth to bulge out there slightly and get in touch with the vapour obstacle. At this point you have 2 layers of efficiency along with a dead surroundings space together in addition to a continuous vapour barrier. Once the foam has fixed up, trim it off flush with all the drywall. The stops of your shims should pretty much flush using the expanding foam now and even they will allow air passage, so caulk the ends involving them to seal off them around the inside. Install casings on the interior and even caulk the joints. Install casings upon the outside minus brick moldings and even caulk the important joints there.
There's a lot of fine detail which i haven't included, for instance type of screws, dimension My partner and i and quality associated with shims. In addition there are options to an amount of problems a person can encounter as you go along. If you will be an installer, you know what I mean. It's not just a matter of going down to the particular building supply store and sticking the particular windows in in the weekend.
When the thought associated with installing your individual windows scares an individual, that's a good place in order to start. Learn around you can before you start and stay careful at just about every stage. Like I said most specialist installers are doing it wrong, which means your probabilities of doing some sort of better job are good. If you have little tools and you've never tackled the renovation job though, you might need to skip this specific one.
